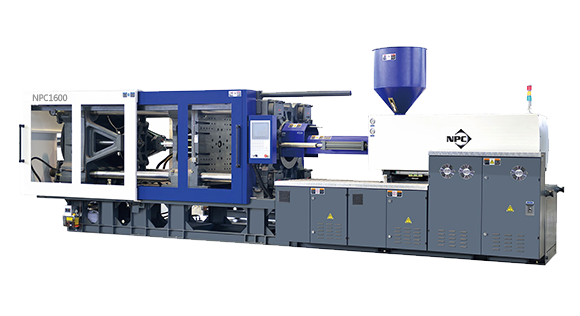
Starting an injection molding machine and installing a mold may seem like routine tasks, but both are essential to safe and reliable production. A proper startup sequence helps ensure that the hydraulic, heating, electrical, and control systems are ready before molding begins, while correct mold installation helps maintain alignment, stability, and consistent product quality.
Skipping or rushing these steps can lead to equipment damage, molding defects, unexpected downtime, or even operator safety risks. For manufacturers, standardized operating procedures are therefore just as important as choosing reliable injection molding equipment.
This guide walks through the complete process, from pre-startup safety checks and machine startup to mold installation, trial operation, and common problem troubleshooting, helping operators build a safer and more consistent workflow.

Before starting an injection molding machinery, operators should first confirm that both personnel and tools are ready. Proper PPE, including workwear, safety shoes, gloves, and other required protection, should be worn. Make sure the necessary tools are available and that the operator understands the machine status and operating procedure.
Next, inspect the machine and surrounding area. Check the power supply and control cabinet for signs of water or oil, and verify that the emergency stop, safety doors, buttons, wiring, handles, and handwheels work properly. For machines that have been idle for an extended period, check for abnormal damage and clean the equipment. Also inspect the mold, mounting bolts, limit switches, and related components.
Finally, check the cooling system before operation:
Completing these checks helps identify potential safety, electrical, mechanical, and cooling issues before startup and provides a reliable foundation for the following operating steps.
Once the pre-startup checks are complete, follow the machine's operating sequence step by step. The exact controls may vary by model, so operators should always follow the manufacturer's instructions.
Step 1: Turn on the Main Power
Switch on the main power supply and confirm that the control panel starts normally without warning alarms.
Step 2: Start the Hydraulic Pump
Press the pump start button. For a new or long-idle machine, allow the pump to run without load briefly and check that it operates smoothly.
Step 3: Heat the Barrel
Turn on the barrel heaters and set the temperature according to the material and molding process.
Step 4: Allow the Machine to Warm Up
Wait until the barrel reaches the required temperature and stabilizes before starting production.
Step 5: Run in Manual Mode
Operate the machine manually and check clamping, injection, screw movement, and other functions for abnormal noise or movement.
Step 6: Test Semi-Automatic Operation
Run several cycles to verify that machine movements and process parameters remain stable.
Step 7: Start Automatic Production
Once all functions are confirmed, switch to automatic mode and begin production.
Normal Shutdown
Stop production and return the machine to a safe position.
Turn off barrel heating.
Stop the hydraulic pump.
Switch off the main power.
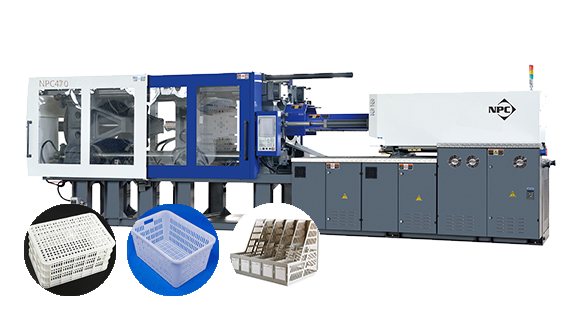
Correct mold installation is essential for protecting the machine, and achieving stable molding performance. The process should be completed carefully from preparation through trial operation.
Before installation, clean the mold and remove oil, dust, or other foreign material. Inspect the mold components, guide pins, and bushings for damage, and lubricate the required moving parts. Then:
Use suitable lifting equipment to place the mold between the platens. The positioning method depends on the mold design.
With a locating ring:
Align the locating ring with the platen center.
Carefully close the mold to confirm positioning.
Without a locating ring:
Adjust the platen position before bringing the nozzle forward.
Check nozzle-to-sprue alignment from the front, rear, left, and right.
Make adjustments until the nozzle and sprue are properly centered.
Fix the mold with clamps or screws. Tighten them gradually in a diagonal sequence to distribute clamping force evenly and prevent mold movement.
Connect the cooling water lines, ejection system, mold temperature controller, and other required equipment. Check each connection before operation.
Close the mold at low speed and low pressure. Check for interference, verify ejection movement, adjust mold thickness if necessary, and perform a trial shot before full production.
Before moving into regular production, operators should complete a final check to confirm that the mold and machine are ready. Use the following checklist to quickly verify the critical points:
|
Checkpoint |
What to Confirm |
|
Safety |
Machine is in manual mode during installation and adjustment |
|
Alignment |
Nozzle, mold, and machine center are properly aligned |
|
Fastening |
Mold is securely and evenly fixed to the platens |
|
Mold Thickness |
Mold thickness is within the machine's specified range |
|
Auxiliary Systems |
Cooling and ejection systems are properly connected and functional |
|
Trial Run |
Low-speed, low-pressure operation is completed without abnormal conditions |

Even after completing the standard startup and mold installation procedures, operators may encounter issues during testing or initial production. Identifying the likely cause can help reduce troubleshooting time and prevent further equipment damage.
|
Problem |
Possible Cause |
Check |
|
Hydraulic Pump Won't Start |
Power supply or safety circuit issue |
Check the main power, emergency stop, and safety doors |
|
Barrel Won't Heat |
Heater or temperature control failure |
Check heater operation and temperature readings |
|
Nozzle Misalignment |
Incorrect mold positioning |
Recheck mold center and nozzle-to-sprue alignment |
|
Abnormal Clamping Noise |
Insufficient lubrication or mold interference |
Check moving parts, guide components, and mold clearance |
|
Flash During Molding |
Insufficient clamping force or mold problem |
Check clamping settings and inspect the mold |
If an issue cannot be identified or corrected through routine checks, stop the machine and have qualified maintenance personnel inspect it before resuming production.
Mastering the correct startup sequence, proper mold installation, and thorough trial run procedures is the foundation of safe, stable, and efficient injection molding production. These standardized practices not only prevent equipment damage and production defects but also extend machine service life and ensure operator safety—delivering tangible benefits to any manufacturing operation.
As a trusted partner in the plastic injection molding industry, NPC Machine has been committed to excellence since 2009. With a 130,000+ m² manufacturing facility and 30% annual sales growth, we offer a comprehensive range of solutions including high-speed series, fruit basket series, basket production design series, and specially designed injection molding machines tailored to unique customer requirements. Our machines and turnkey solutions have been exported to Europe, the Middle East, Africa, Southeast Asia, and Latin America. Beyond equipment supply, NPC provides expert equipment selection guidance, comprehensive operation training, and reliable after-sales support to ensure your production runs smoothly from day one.
Contact NPC Machine today to learn how we can support your injection molding operations with high-performance equipment and professional service.
By continuing to use the site you agree to our privacy policy Terms and Conditions.